Looping 101: An India Perspective
- T1DF India

- Jun 2, 2021
- 9 min read

Continuous Glucose Monitoring (CGM) devices have been a boon for people living with Type 1 Diabetes. Gone are the days when people needed to prick their fingers ten times a day to measure their blood glucose (BG) levels and still miss out on capturing important trends in their levels. Now a simple alarm on our phones can alert us of our falling or rising levels, enabling us to proactively treat it and it’s all possible because of these CGM devices.
What is looping?
How awesome would it be if the CGM devices could communicate directly with the insulin pump to take the required action of suspending the basal if the BG levels are crashing fast or increasing basal if the BG levels are climbing? What we just described is basically the essence of closing the loop on insulin pumps.
The term looping refers to closing the loop between one’s insulin pump and a continuous glucose monitoring (CGM) system.
DIY Looping
DIY Looping is the process by which someone with diabetes overrides their insulin pump with a hardware module, such as a RileyLink. This essentially makes the insulin pump communicate with the CGM to make basal insulin adjustments automatically, instead of manually suspending, reducing, or increasing insulin throughout the day.
The main aim while writing this post was to keep it relevant for the Indian population so the main focus going ahead will be on keeping an Indian perspective to things. There are enough articles already on the web that explain the process of setting it up using CGM devices like Dexcom. In this post, I’ve described how to how to set up a loop using Freestyle Libre Pro which is quite popular among people living in India with Type 1 Diabetes.
A point of caution to be noted however is that since this system is NOT MEDICALLY APPROVED, any risk and liability is on the user if they proceed to build this for themselves.
India Perspective
In India, CGM devices stay highly unaffordable for regular use till date. With no proper health insurance plans for people living with T1D the economic burden of the cost of a CGM is too much for most of the T1Ds. This didn’t stop the T1s from finding a jugaad (makeshift alternative) for that.
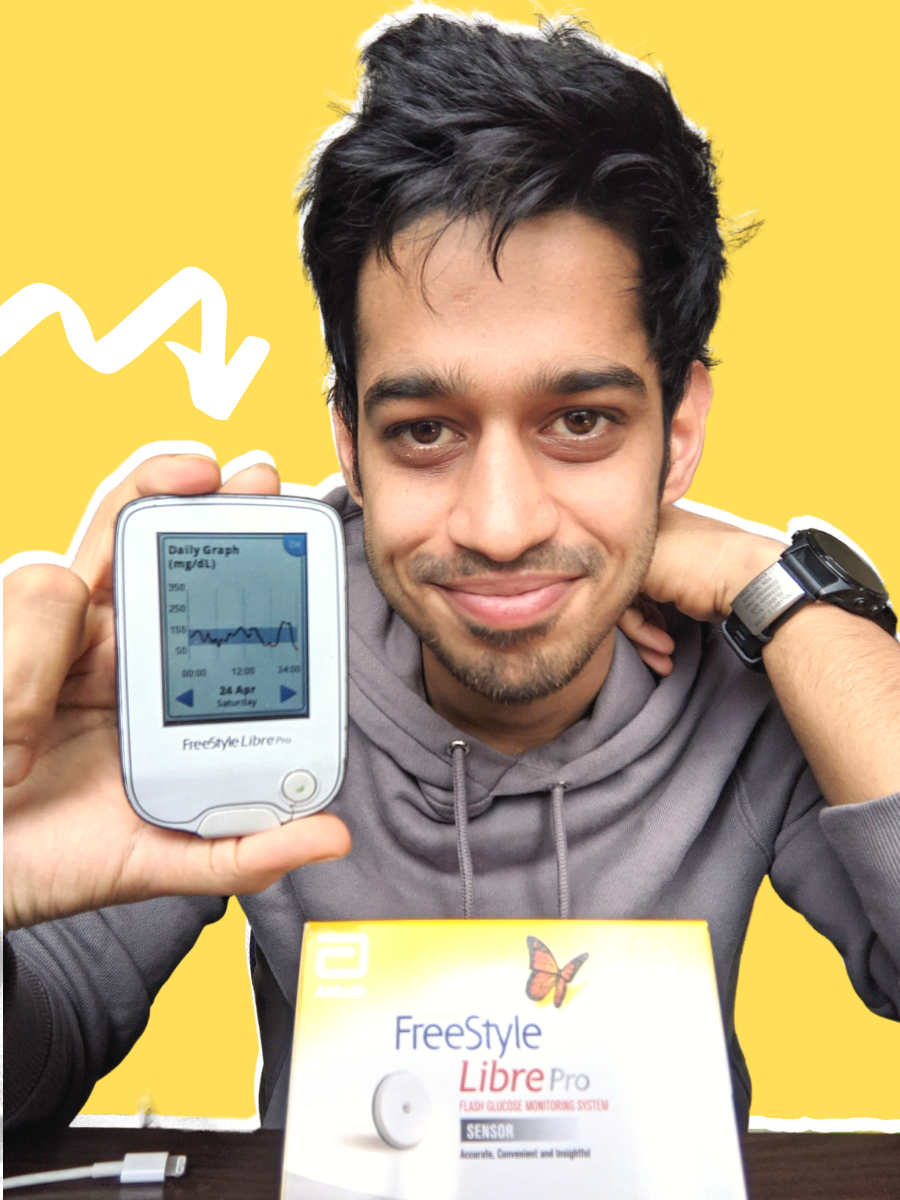
People in India have been using the Freestyle Libre Pro for the past few years since the Libre Freestyle wasn’t available in the country until very recently. Freestyle Libre Pro is similar to Freestyle Libre, with the only difference being the purpose it was intended to be used for. Libre Pro (Pro for Professional) was devised to be a healthcare professional’s tool, intended to monitor how well their treatment for their T1D patients is working out. It doesn’t give any numerical readings like the patient version Libre and displays only a graph of BG levels which is not very user friendly as it requires estimation of the readings from the graph. However when paired with a third party app Glimp, it becomes a powerful tool as it not only shows numerical readings but also lets the user calibrate it with the readings from a glucometer. Libre however still is a Flash Glucose Monitoring System (FGM) and requires manually scanning the sensor via NFC to obtain the readings unlike a CGM which is constantly transmitting the readings to the smartphone and is a much more powerful tool since continuous transmission allows setting up alarms for dangerous hypoglycemia and hyperglycemia levels.
The next leap in diabetes management for people living with T1D in India came in the form of smart readers like Miaomiao, Blucon and the recently released Bubble. These are basically smart devices that sit on top of the Libre/Libre Pro sensors and continually transmit the readings to the smartphone. These readers essentially convert the Libre to a full-fledged CGM. I’ve covered more on Miaomiao 2 reader in a previous post which you can refer HERE for more information.
Now that people were able to enjoy the CGM experience at a relatively more affordable price it was only natural for a select few to go ahead and figure out ways of setting up a loop with it. This is where the DIY Loop came in!

I met Anirudh, a friend living with T1D, for the first time in 2018 during a Type One Run event that I had organized in Bangalore. The same year after a lot of tinkering and research, he became one of the first persons in the country to have successfully set up the closed loop using Libre Pro sensors.
Going ahead, with his help I’ve tried to compile a summary of his set up so that interested people might be able to get it up and running without scratching their heads.
Equipment
Insulin Pump: In India, only the below mentioned models are compatible for setting up the DIY Loop: - Medtronic 515 or 715 (any firmware) - Medtronic 522 or 722 (any firmware) - Medtronic Worldwide Veo 554 or 754 (firmware 2.6A or lower) If you have one of these, you are good to proceed. Congrats!
Link: It’s an open source connecting link between an insulin pump and a DIY Loop application. RileyLink has been one of the most popular and widely used links but there are newer models like OrangeLink available in market too.
CGM: For CGM, a traditional CGM like Dexcom as well as the hybrid (Libre/Libre Pro)+(Miaomiao/Bubble/Blucon) combinations work
App: Loop/FreeAPS (iOS) or AndroidAPS/OpenAPS(Android)

Setup
Going ahead, I’ve described Anirudh’s setup which consist’s of RileyLink, Freestyle Libre Pro + MM2, FreeAPS on iPhone. Setting up other systems would more or less look similar.
Miaomiao
Setting up Miaomiao is fairly easy and has been covered already here
FreeAPS Installation
FreeAPS is basically same as Loop but with certain customisations built on top of it. Unlike Android where it’s easy to share and install .apk files, on iOS you require a Mac/Macbook to build your own app using source code and install the same. Following are the high level steps to install it on iPhone:
Ensure you have the latest version of XCode installed on mac. If not, download it
Clone this repository and follow the steps on this page to build the app on your iPhone using XCode. Your phone would need to be connected to the Mac during the entire build process for it to get installed on your iPhone.
You’ll need to be familiar with Github for this part and in case you aren’t feel free you take help from your tech-savvy friends. Once you’re done with the steps above, you’ll have successfully installed the FreeAPS app on your iPhone. Next, we come to configuring it.
FreeAPS Configuration
Once installed, open the settings on FreeAPS app and update your configuration parameter of ISF, ICR, basal rate, correction range,etc as seen in the screenshot(target range)
Then on your medtronic pump, navigate to Menu-> Utilities-> Remote Options. Once there, select the On option, click on Add ID and enter 000000 (six zeros). This ensures that your pump is able to connect to third party devices.
Then coming back to FreeAPS settings, click on Add Pump, select Minimed 500/700 series, and select your Riley Link device once it shows up.
On the following screens set pump details like region to WW (Worldwide) and enter the pump ID. Once successfully connected, press continue and review your parameters on the following screens. Ensure that Delivery Limits is enabled. Your pump is all set to be operated via FreeAPS app
Then as a next step we connect our CGM to FreeAPS. In FreeAPS settings, select Add CGM, then select Nightscout CGM and enter your NS server details.
In Settings, go to Microboluses and choose when you want to enable microboluses i.e with or/and without carbs. Microbolusing refers to automatically delivering small boluses (x 0.1U) when required. If you want to maximise your time in range(TIR), select both with carbs and without carbs option. However it comes with a caveat that if your CGM gives faulty readings, there is a risk of slipping into hypo due to overbolusing.

Now once you save and exit, you are almost done!
Closing the loop
As a last step, click on Close Loop once you’re ready!

User Experience
The user experience for Anirudh has been quite a positive one but nothing great is ever without its cons. Below we’ve tried to sum up the user experience of being on loop as separate lists of pros and cons.
Pros:
Waking up to perfect levels: It’s not very uncommon for people living with T1D to sleep with perfect bedtime levels but still wake up all tired and lazy only to find their BG skyrocketing due to some late night snack or insufficient basal. However, being on a closed loop system the insulin pump automatically adjusts your basal rate dynamically throughout the night so as to achieve your set target range of blood sugar levels and you almost wake up to perfect levels daily!
Minimal manual intervention: Being on loop your mind can finally relax a bit since it no longer has to to worry about those correction doses that you used to manually dose earlier. If your levels are over the target range and your bolus onboard isn’t sufficient, the insulin pump will automatically increase the basal rate temporarily or deliver microboluses till your levels reach the target range you’ve set for yourself.
Alternative to pre-bolusing: Pre-bolusing for meals can help avoid spikes in your BG levels although it’s not always easy to prebolus. For example if you’re eating out and there’s no certainity regarding the time it’ll take for your food to arrive, prebolusing isn’t recommended since it can lead to hypoglycemia if your food gets delayed. In such situations, instead of pre-bolusing a person on loop can instead take a square bolus. The loop then automatically takes care of cutting down basal for the next couple of hours and then resume as needed.
Insulin requirement estimation becomes easier: Since all the carb and dosage information gets recorded in Nightscout, it becomes easier to estimate the correct insulin requirement for a particular meal. For example, if you bolus 5 units for a meal and it falls short, the loop will increase basal rate temporarily or deliver microboluses until you’re back in range. You can easily add this extra correction dose delivered by the loop to your bolus to estimate your actual insulin requirement for that particular meal for future reference.
Allows accurate parameter estimation: Now once you’ve been on loop for a while using your manually estimated parameters like IC ratio, ISF and Basal rate, you can use all the data in the nightscout to accurately determine your correct parameters using a third-party tool called Autotune which has been explained in the next section.
Cons:
Another device to carry: While a link device like RileyLink hardly weighs anything, having to carry it everywhere can make it seem less desirable.
High mobile battery consumption: This is pretty self explanatory. Since the loop is active 24x7, the pump and phone communicate continuously throughout the day and as a result the mobile battery discharges at a very fast rate.
High pump battery consumption: Just like the phone, the pump battery takes a hit too. With loop, the pump battery may last somewhere between 5–7 days which is not that great.
Risk of CGM malfunction: While the chances of this happening is very low, in the case of continuous false readings from a CGM the loop might overdose/underdose you.
Needs network: If you’re using the Libre Pro and a smart reader (like MM2) combination, having a proper network connection becomes mandatory for the loop to function. In absence of network coverage, the loop loses it’s connection since Libre Pro + MM2 cannot communicate directly to FreeAPS and instead relies on Nightscout which requires network to be accessed.
Autotune
Since the carb/insulin data flows into Nightscout, a third party tool called Autotune allows accurate estimation of your various parameters like ISF (Insulin sensitivity factor), IC/CR ratio (insulin carb ratio) and hourly basal rate using your NS data. For the best estimation, ensure that you provide atleast 1 week of data. A sample of Autotune’s analysis is shown below.

Here it basically suggests a very minute change in the IC ratio from 8.1 to 8. Also it’s not a shocker to see different basal rates being suggested throughout the day. The basal rate for a person does vary throughout the day, just that it needs a lot of observation and monitoring to estimate it accurately. With Autotune however, this exercise is as simple as a click of a button!
Results
Let’s have a look at a 90 day report to see the results of being on loop.
84.7% Time in range(TIR) which is set 70–140mg/dL is super impressive without any doubt and so is an hbA1c of 5.4%.
Also a Standard deviation of 28.1mg/dL has to be appreciated!


Conclusion
In summary, Loop makes a huge impact on diabetes management through maximising time in range and enabling tighter controls on one’s BGs. However, as simple it might seem at first given that the system automatically makes certain adjustments, there’s a lot more to it than that. It is to be noted that one needs to have an experimental/exploratory attitude while entering the loop paradigm. It’s not something that once set up, can be left unattended and still be expected to work like a magical black box. Setting up and using a closed loop system requires one to be observant and to be proactive in monitoring its working on a regular basis. It goes without saying that it not only requires a very good grounding on the basics of diabetes management but also the aptitude to tinker and tune the various parameters and settings till you’re satisfied enough with it, to call yourself a looper on social media ;)
Alternatives
For Android, AndroidAPS is a great alternative to FreeAPS/Loop. Setting it up should be a similar exercise like the one we described above. However I’ll try and cover the detailed setup for it in a future post hopefully.
Relevant links
AndroidAPS: https://androidaps.readthedocs.io/en/latest/
Loop Support Group: https://www.facebook.com/groups/TheLoopedGroup
AndroidAPS Support Group: https://www.facebook.com/groups/1900195340201874
LoopandLearn Group: https://www.facebook.com/groups/LOOPandLEARN
FreeAPS (Telegram group) : https://t.me/LoopAPSEng
Comments